Cyberduck File Transfer Instructions for MacOS
Revised by Pedro Lorenzano Rodriguez (CSE-ITS) • February 13, 2025
Attention:
These instructions are written for MacOS, while Cyberduck is available for both MacOS and Windows we recommend using WinSCP for Windows to transfer files.
Instructions:
1. Download Cyberduck from https://cyberduck.io/download/
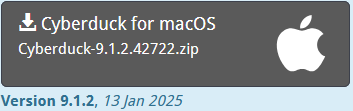
- Version number will change over time
2. The download will be a zip file. In Finder you can double click on the file and it will be unzipped, once that is complete you will have Cyberduck installed.
3. Before you open Cyberduck you will need to create/modify the SSH config on your local machine. NOTE: You only do this configuration once.
- Open terminal
- In the terminal, you can confirm that you have "~/.ssh/config" file created. This file is automatically created when you SSH to a machine, if you have never done so this file will not exist.
- You can run
ls ~/.sshto confirm the directory exist and if it does you can go to the next bullet point. -
if you get "ls: cannot access '/local/Your_Username/.ssh': No such file or directory" you will need to create the folder
-
To create the directory run
mkdir -p ~/.sshon the terminal
-
- You can run
-
You will need to create the config file and modify to have you CoyoteID and the preferred system you wish to connect to.
-
Create file by running
touch ~/.ssh/config -
Once you have created the file you can copy and modify the text below in a text editor or in Vim.
-
#This is the contents of ~/.ssh/config
Host cse-jump
HostName cse-jump.csusb.edu#Please change COYOTEID to your actual ID number example 001234567
User COYOTEID@csusb.eduPort 22
#JB359-2 is an example you are welcome to choose between JB-359 0-10 and JB-358 0-10. Just make sure to modify the Hostname as well.
Host jb359-2
Hostname jb359-2.csusb.edu
ProxyJump cse-jump
- You can paste and modify this by running
vim ~/.ssh/configand right clicking on the terminal to paste. - To exit Vim by click
escon your keyboard and entering:wqfollowed byReturnon your keyboard
-
-
4. You open Cyberduck and add a client
- Click on the + on the bottom left. This will open a separate panel.
- You need to select and enter the following:
- Select SFTP (SSH File Transfer Protocol) from the drop down menu
- Server: jb359-2 ##This has to match the machine you selected in ~./ssh/config
- Username: 001234567@csusb.edu ##Please enter your own Coyote ID
- Example config:
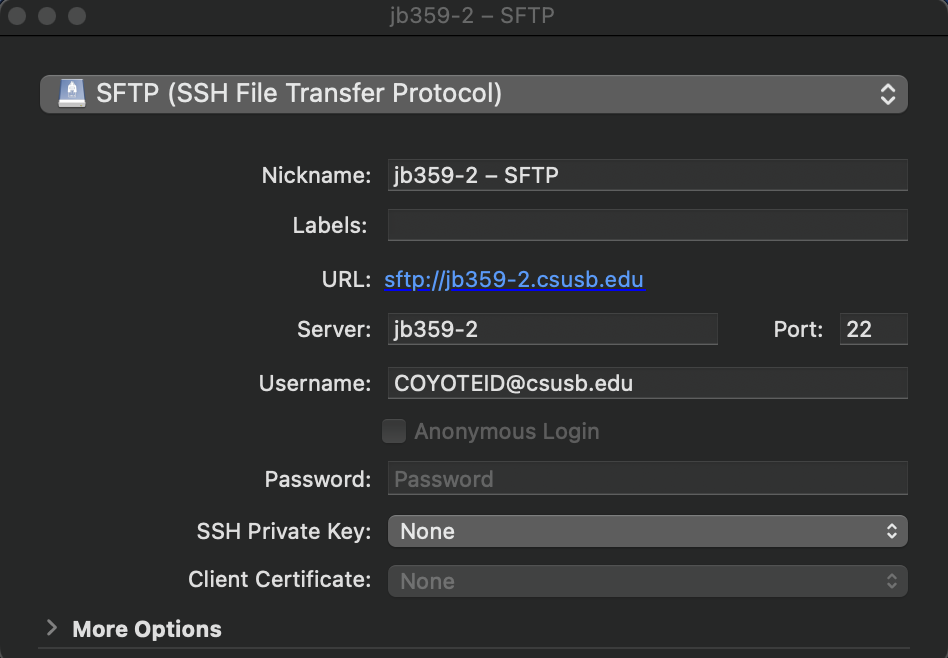
- If you like you can also give it a more memorable Nickname, for example "CSE Lab JB359-2"
- Once that is completed you can close the panel and you should see it on Cyberduck

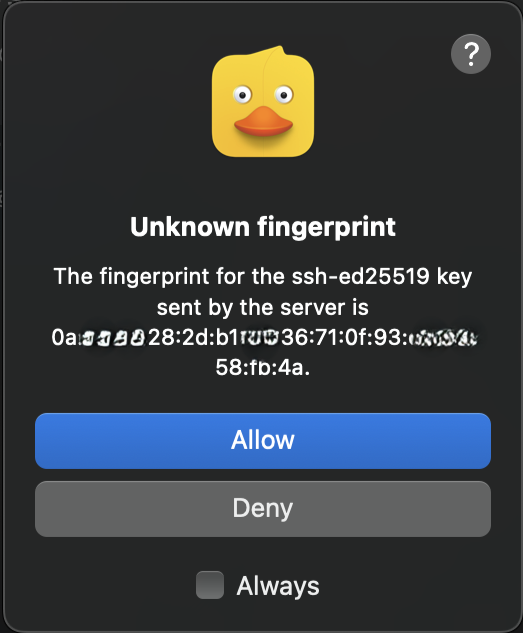
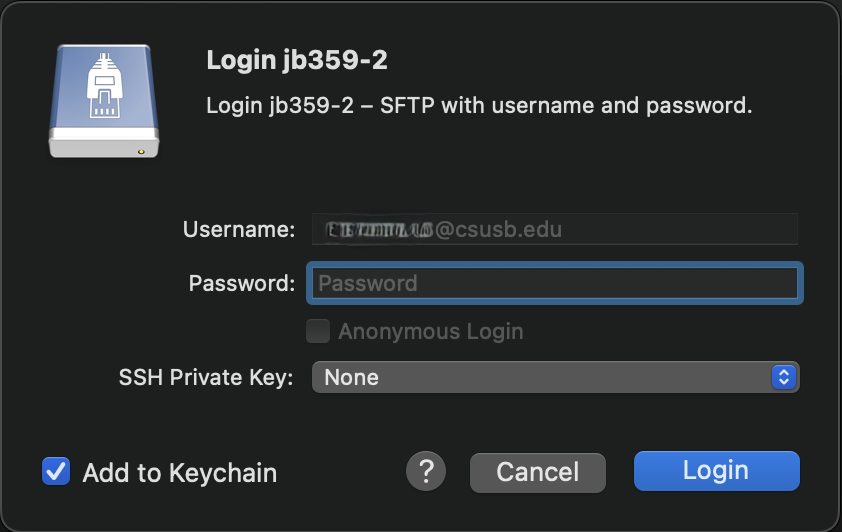
5. Once the client is added, you can double click and connect to the client
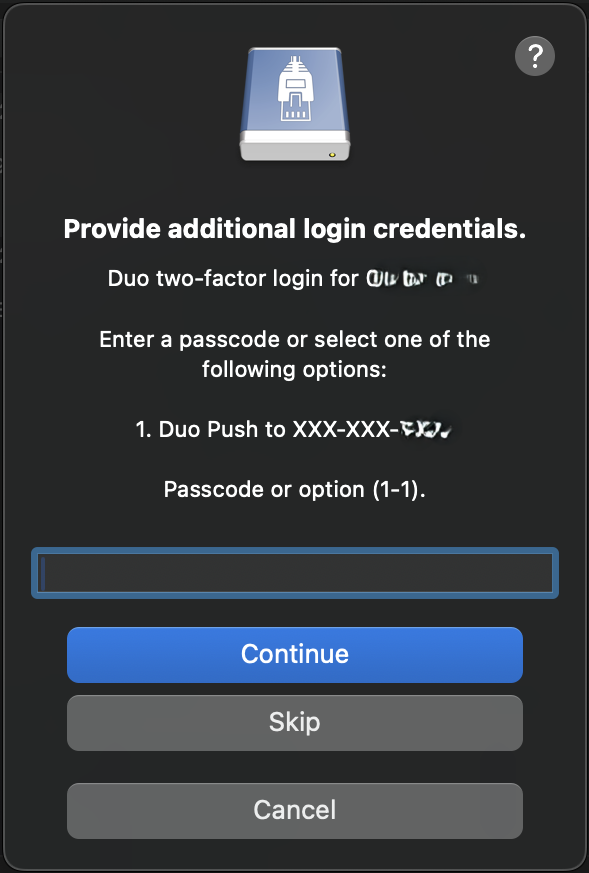
- You will get some prompts that you can approve.
- You will be asked to enter your MyCoyote Password
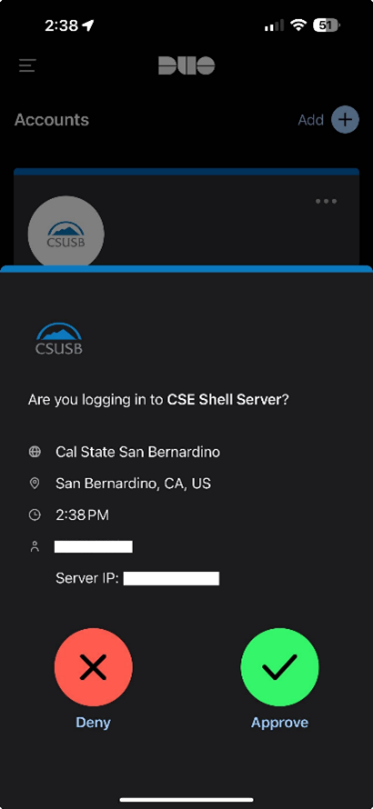
- You will be prompt to select a number for DUO authentication and have to approve DUO on your phone.
- Once all that is done you will be connect to the client and should be able to see the files on your home directory.
6. You can now download and upload files to your Linux lab.